Basic Beginners Guide to Adobe Photoshop
Adobe Photoshop is proven to be a very amazing software for photographers.We chose to assemble a point by point control that goes over the nuts and bolts of the most famous, and ostensibly most dominant post-processing tool available. Many of us have heard others state something like “This image is photograph shopped” at any rate once. Indeed, even non-picture takers utilize this expression all when referring to carefully manipulated images. In other words, Photoshop has gotten synonymous with post processing.
Ever wanted to figure out how to utilize Adobe Photoshop, yet had no clue where to begin? The mass of symbols and menus can be intimidating. Most Photoshop instructional exercises for beginners are truly for individuals who are as of now acquainted with the program. This fundamental, thirty-minute instructional exercise is definitely not a thorough instruction manual. It just shows you the couple of basic highlights you have to know, to begin using Adobe Photoshop. From that point, you’ll rapidly find the majority of the other highlights of the program yourself.
The Complexity of Photoshop
Despite the fact that there are many tools for processing an image, not very many have approached Photoshop as far as highlights and usefulness. Unquestionably, Photoshop is a huge and complex bit of software, and there are so many implicit and outsider tools accessible for it, that it is difficult to attempt to learn everything. Indeed, Photoshop’s tools advanced such a great amount throughout the years, that one could get comparative outcomes using altogether different tools.
In the event that you scan online for a path how to complete something in Photoshop, you may be overpowered by what you find. In many cases, picture takers wind up showing various methods to get to the final product, which can be confusing, particularly for the individuals who are starting out.
Opening an Image in Photoshop
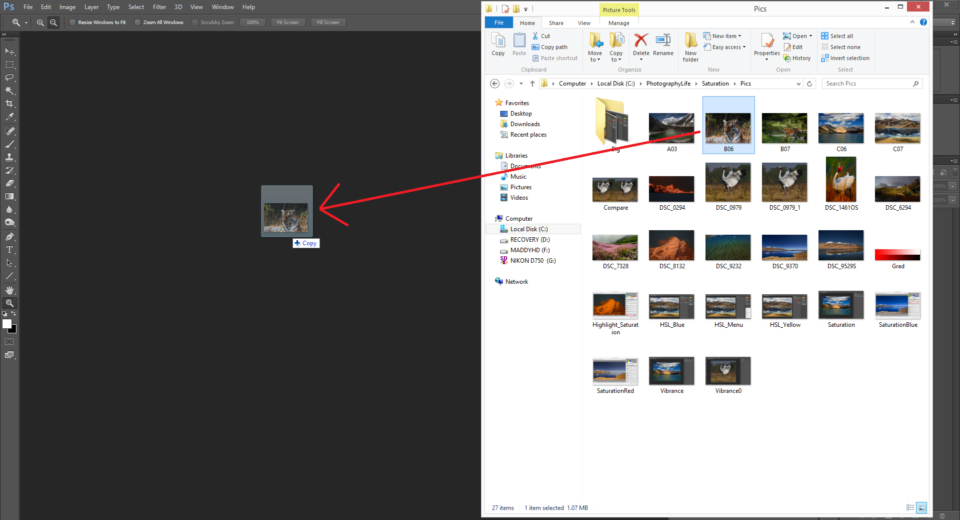
As referenced above, you can either open an image from Lightroom with every one of the changes that you made unmistakable in Photoshop, or you can open an image legitimately in Photoshop. As I have referenced before, there is more than one approach to do a single assignment in Photoshop. I am going to explain just the one which is the most straightforward one I for one use. The most broadly utilized method for opening an image in Photoshop is simply dragging the image from into the Photoshop window, as demonstrated as follows:
Opened file in Photoshop
By it is the file size presentation (checked white). Depending on the sort of file you are working with, the size of the file increases substantially. For instance, the size of a 24MP full edge RAW file would around be 30 MB. A similar file can go up to 1 GB in the event that you add twelve layers added to it. We will get to layers in a tad.
At the point when you convert it into a JPEG of a similar goals, you may wind up with a 8-12 MB file. For each layer you add to a Photoshop report, the size of the file increases in products of the size of the base layer.
Photoshop Toolbox
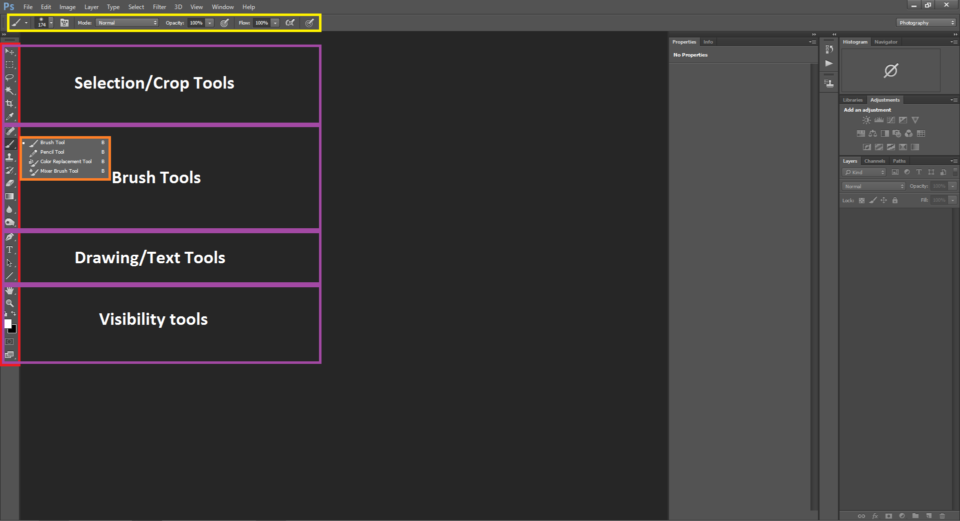
Most of the tools that you see on the toolbar contain various tools. It for the most part is indicated by a little bolt at the base right corner. This basically means the tool has a gathering of tools that spring up when you right-click it (checked orange) which perform various activities.
At the point when you select a tool from the toolbar, the properties or accessible choices for the corresponding tool get showed on the top, just beneath the menu bar (checked yellow).
Crop Tool in Photoshop
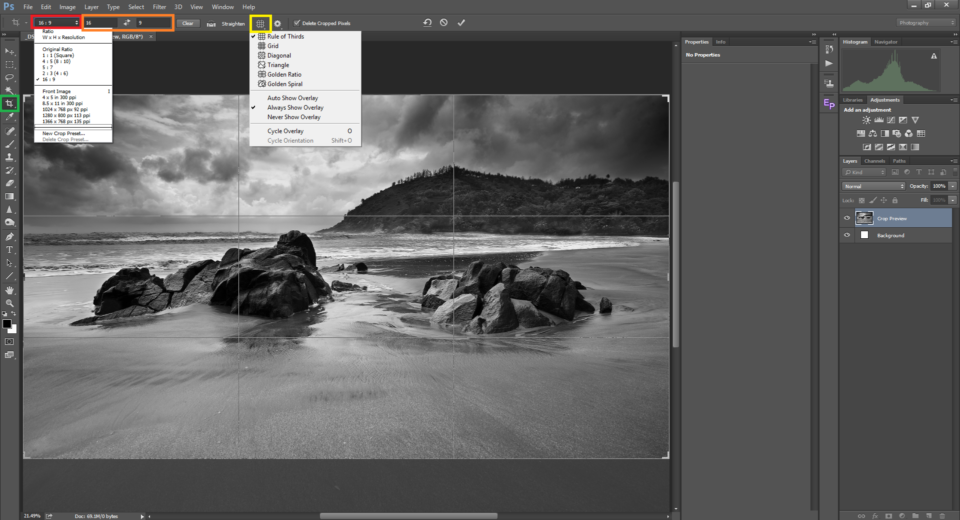
While cropping, you can change its perspective proportion. It is the proportion between the length and the stature of an image. As a matter of course, Photoshop will in general retain the original proportion of the image. You can change the perspective proportion by selecting one of the proportions starting from the drop (checked red). You can likewise change it by straightforwardly entering the length and the broadness in the segments beside the drop down menu (stamped orange). In the event that you would prefer not to adhere to any pre-defined proportion, you can tap on the unmistakable catch and Ps will enable you to get a custom proportion.
Spot Healing Tool
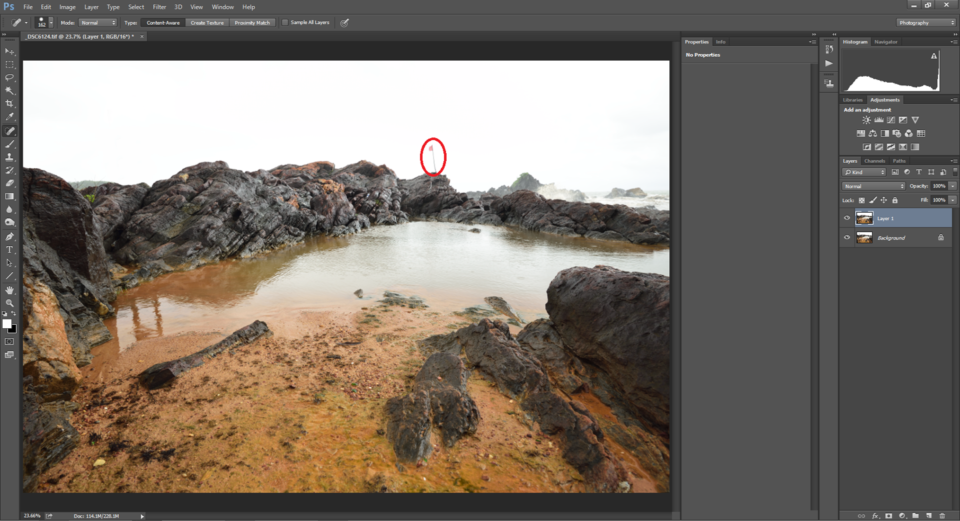
There are times where we have dust chosen our camera sensors. On the off chance that it lands in a spot where there are subtleties, it for the most part doesn’t appear a lot. Be that as it may, when it lands on a detail-less spot like the sky or a splendid foundation, it appears as a dull spot. There are other occasions where we want to expel distracting objects from the edge. The spot healing brush comes to help to handle such issues
Select the size (width in pixels) of the brush you want to utilize. Then increase or lessening the hardness of the brush. Presently once the fundamental choices are chosen, drag the mouse over the fix that you want to evacuate.
Clone Stamp Tool
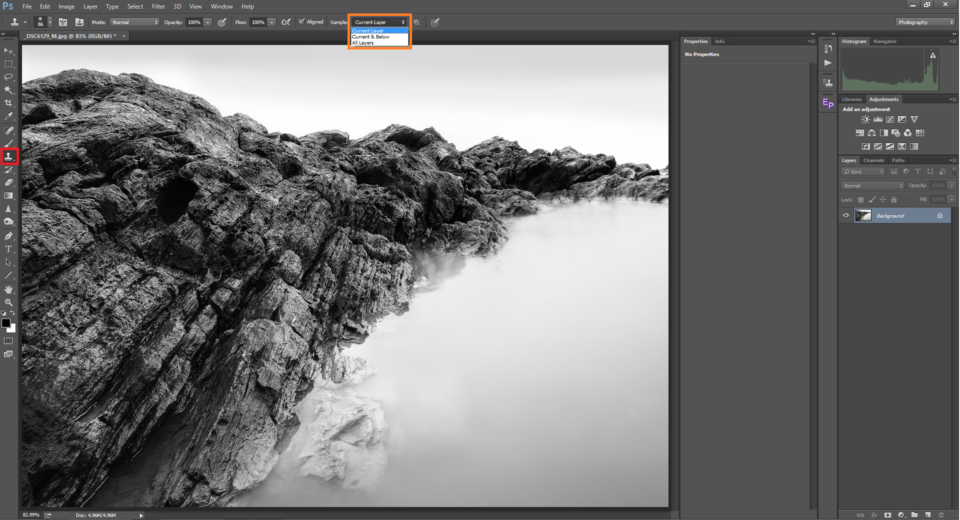
This is an advanced rendition of the spot healing tool. The spot healing tool consequently recuperates the odd pixels by scanning the surrounding pixels. It works extraordinary when we have an even background. In any case, the Spot mend tool probably won’t work constantly when we have distracting objects against complex foundations.
Instead of taking the reference setting consequently, the clone tool gives us a chance to test the source and replaces the objective. Photoshop replaces the objective pixels with the example pixels. More often than not a soft brush works for the clone stamp tool.
Brush Tool

The brush tool is one of the most valuable tools in the tool palette. More or less, the brush tool does precisely what a brush should do in this present reality.
Select the brush tool (checked red in the image beneath), then select a closer view shading (stamped green) and then pick the brush size as we did with the Spot healing tool and pick the murkiness. Obscurity is what might be compared to hardness in the spot healing tool. The distinction being, mistiness connotes the quality of the brush. It basically paints the frontal area shading, for that specific darkness on your image.